Skip to Content Skip to Footer
LiveWell WIC logo
Livewell Wic
  • Home
  • Ellyn Satter
    • Ellyn Satter
      Prenatal / Postpartum
    • Ellyn Satter
      Newborn / Infant
    • Ellyn Satter
      Older Baby / Almost Toddler
    • Ellyn Satter
      Toddler / Preschooler
  • Breastfeeding
  • Eat·Grow·Live Healthy
    • Eat·Grow·Live Healthy
      Women
    • Eat·Grow·Live Healthy
      Infants
    • Eat·Grow·Live Healthy
      Children
    • Eat·Grow·Live Healthy
      Fathers
  • Live Well Blog
  • Español

Tuna noodle casserole

  • Home
  • Ellyn Satter
  • Prenatal / Postpartum
  • Frequently Asked Questions
  • Recipes
  • Tuna noodle casserole
Creamy chicken noodle casserole in a black skillet.

INGREDIENTS

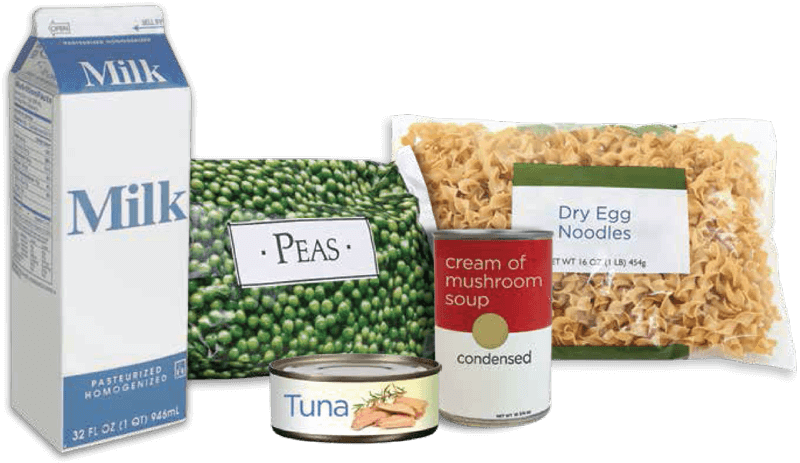
1 lb dry packaged noodles (either wide or narrow)

12-oz can tuna

10-oz package frozen peas

10-oz can cream of mushroom soup

1/2 cup milk

Quick directions:

Boil and drain the noodles. Mix noodles with tuna, canned soup, milk, and peas. Gently heat.

Toddler joyfully eating pasta at kitchen table.
Assorted pantry items including milk, peas, and noodles.

Step-by-step directions:

  • Fill a 4 1/2-quart pan about 1/2 to 2/3 full of water. Add 1 teaspoon salt per quart of water. Heat until it is boiling hard. Add 1 lb dry packaged noodles and boil for 5 to 8 minutes. Taste the noodles as they cook to tell when they are done the way you like them.
  • Open the 12-oz can tuna, drain and break into flakes with a fork. In a small bowl, mix with a 10-oz can cream of mushroom soup and 1/2 cup milk.
  • Open the 10-oz package of frozen peas and empty it into a colander. When the noodles are done, pour the noodles and cooking water through the peas in the colander to thaw the peas and warm them up.
  • Mix everything together. Put the noodles and peas into the noodle pan and add the tuna-soup-milk mixture.
  • Turn the heat on medium low and warm the whole thing up until it is steaming. Stir some to keep it from burning but don’t beat up the noodles. Eat and enjoy!

Feeding your child:

Your child who eats family food can have this. Cut up the noodles, give it time to cool, and let him eat with his fingers.

Illustration of abstract green shape with various overlapping curves.

You May Also Like...

Macaroni-tomato-hamburger casserole

Macaroni-tomato-hamburger casserole Share to social Share INGREDIENTS 1 lb ground beef1 large onion1/2 lb dry macaroni28-oz can and 15-oz can (approximate, sizes vary) inexpensive tomatoes Quick directions: Boil noodles. Brown…

Read More

How to feed your baby

How to feed your baby Share to social Share How is feeding going? What do you like about feeding? What don’t you like? Is there anything you would like to…

Read More

Understand your newborn

Understand your newborn Share to social Share What can your baby do? Does he know you are special? Can he tell you what he wants? What does he like? Your…

Read More

© Ellyn Satter

LiveWell WIC program logo

Contact Us

USDA is an equal opportunity provider, employer, and lender.

Cookie PolicyAbout UsPrivacy PolicyTerms of Agreement

© Brush Art Corporation

  • Email
  • SMS
If you are using multiple emails, separate them with commas.

    SMS Communication Consent

    Share

    Share this link via:

    Cartoon vegetables with leafy tops gather playfully together.

    Side-Lying Hold

    1. For the right breast, lie on your right side with your baby facing you.
    2. Pull your baby close. Your baby’s mouth should be level with your nipple.
    3. In this position, you can cradle your baby’s back with your left arm and support yourself with your right arm and/or pillows.
    4. Keep loose clothing and bedding away from your baby.
    5. Reverse for the left breast.

    This hold is useful when:

    • You had a C-section
    • You want to rest while baby feeds
    • You are breastfeeding in the middle of the night
    • You and your baby are comfortable in this position
    Yellow circle with abstract, jagged shapes and patterns.

    Cross-Cradle Hold

    1. For the right breast, use your left arm to hold your baby’s head at your right breast and baby’s body toward your left side. A pillow across your lap can help support your left arm.
    2. Gently place your left hand behind your baby’s ears and neck, with your thumb and index finger behind each ear and your palm between baby’s shoulder blades. Turn your baby’s body toward yours so your tummies are touching.
    3. Hold your breast as if you are squeezing a sandwich. To protect your back, avoid leaning down to your baby. Instead, bring your baby to you.
    4. As your baby’s mouth opens, push gently with your left palm on baby’s head to help them latch on. Make sure you keep your fingers out of the way.
    5. Reverse for the left breast.

    This hold is useful when:

    • Your baby is premature
    • Your baby has a weak suck
    • Your baby needs help to stay latched
    • Your baby needs extra head support
    • You and your baby are comfortable in this position
    Cat playing with butterfly in a garden.

    Clutch or “Football” Hold

    1. For the right breast, hold your baby level, facing up, at your right side.
    2. Put your baby’s head near your right nipple and support their back and legs under your right arm.
    3. Hold the base of your baby’s head with your right palm. A pillow underneath your right arm can help support your baby’s weight.
    4. To protect your back, avoid leaning down to your baby. Bring baby to you instead.
    5. Reverse for the left breast.

    This hold is useful when:

    • You had a C-section
    • You have large breasts
    • You have flat or inverted nipples
    • You have a strong milk let-down
    • You are breastfeeding twins
    • Your baby likes to feed in an upright position
    • Your baby has reflux
    • You and your baby are comfortable in this position
    Peach circle with abstract shapes radiating outward.

    Cradle Hold

    1. For the right breast, cradle your baby with your right arm. Your baby will be on their left side across your lap, facing you at nipple level.
    2. Your baby’s head will rest on your right forearm with your baby’s back along your inner arm and palm.
    3. Turn your baby’s tummy toward your tummy. Your left hand is free to support your breast, if needed. Pillows can help support your arm and elbow.
    4. To protect your back, avoid leaning down to your baby. Instead, bring your baby to you.
    5. Reverse for the left breast.

    This hold is useful when:

    • Your baby needs help latching on
    • You and your baby are comfortable in this position
    Smiling peach character waving cheerful hello.

    Laid-Back Hold

    1. Lean back on a pillow with your baby’s tummy touching yours and their head at breast level. Some moms find that sitting up nearly straight works well. Others prefer to lean back and lie almost flat.
    2. You can place your baby’s cheek near your breast, or you may want to use one hand to hold your breast near your baby. It’s up to you and what you think feels best.
    3. Your baby will naturally find your nipple, latch, and begin to suckle.

    This hold is useful when:

    • Your baby is placed on your chest right after birth
    • You have a strong milk let-down
    • You have large breasts
    • You and your baby are comfortable in this position